Globodox is shipped with default stamps for e.g. the Approved and Reject, that are used to Annotate documents. However, you can also create stamps using Globodox Template Manager.
To Create a Stamp Template
| 1. | In Globodox, click the Tools tab. |
| 2. | Click the Template Manager button. The Template Manager window be launched. |
| 3. | Click the Stamp option in the left pane. The Stamp Template pane will be displayed. |
| 4. | Click the New button on the Template Manager window to create a new Stamp Template. The New Stamp Template window will be launched. |
| 5. | Enter a name for this template in the Template Name box. |
| 6. | Enter a short description about this template in the Description box. |
| 7. | From the Stamp Type drop-down select the General option (selected by default). |
| 8. | From the Stamp Source drop down select the Image File option if you want to use an image as a stamp. Now, click the Browse... button to select an image for the stamp from the Select an image file to use as a stamp option.
For e.g. If you already have images for Approved, Rejected stamps then you can use these images instead of the default stamps that are shipped with Globodox. |
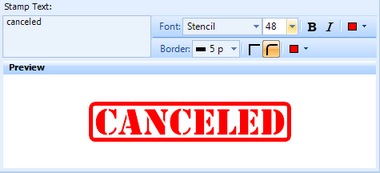
| a) | Enter the text for the stamp in the Stamp Text box. For e.g. Paid, Canceled etc. |
| b) | Select a font and a size for the stamp from the Font drop down. |
| c) | Select a color for the font from the Text Color drop down. |
| d) | Select a width for the stamp's border from the Border drop down. If you do not want a border select the None option. |
| e) | Select a shape for the stamp's border by clicking Rectangle button or Rounded Rectangle button. |
| f) | Select a color for the stamp's border from the Border Color drop down. |
| g) | The stamp will be displayed in the Preview pane.
 |
|
| 10. | Now, click the Save and Close button to save the changes and close the window. |
| 11. | The stamp will now be displayed on the right pane i.e. Stamps list. |
|
Notes:
| • | You can click the Save and New button to save the changes and open the New Stamp Template window. |
| • | To modify an existing template, select a Stamp Template from the list and click the Edit button on the Template Manager window. |
| • | To delete a stamp, select a Stamp Template from the list and click the Delete button on the Template Manager window.
|
Related Topics
Insert Stamp on a document
Create a Document Template
Page URL:
https://www.globodox.com/support/help/index.htm?create_stamp_template.htm

